MID-SCALE
- Property/application size: WeinGut Fritz Walter, 76889 Niederhorbach. 16 new rooms, a spa area, two event rooms and a guest area implemented with KNX.
- Operator: Eckhard Walter
- Examples of the JUNG devices used: Visu Pro Server H3, IPR 300 S REG
Objective of the project:
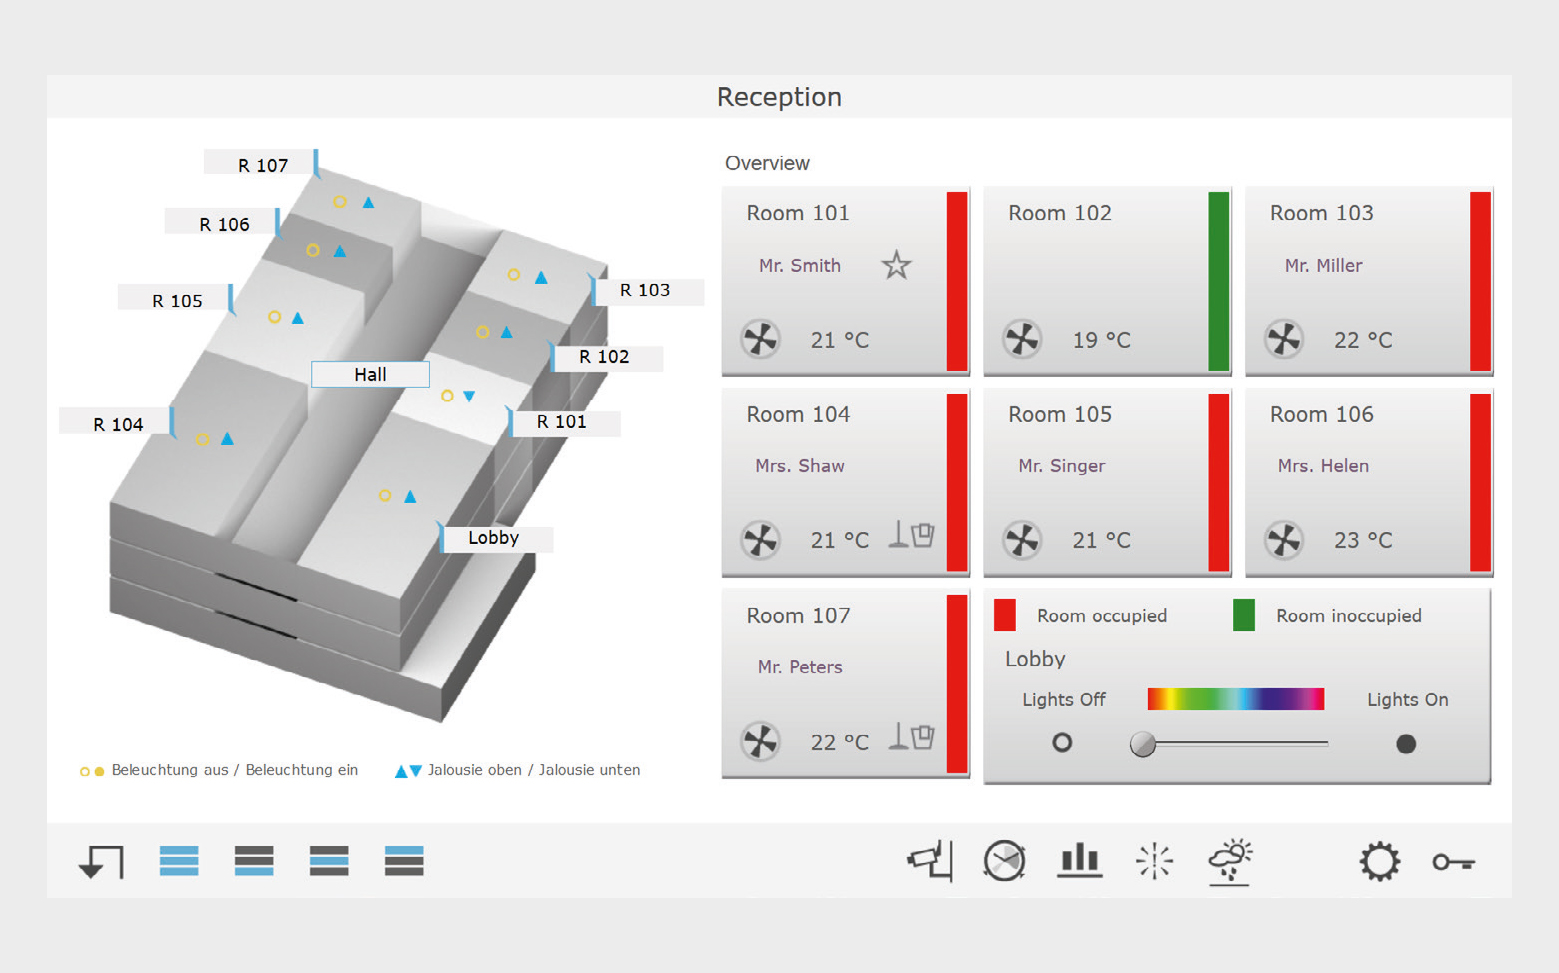
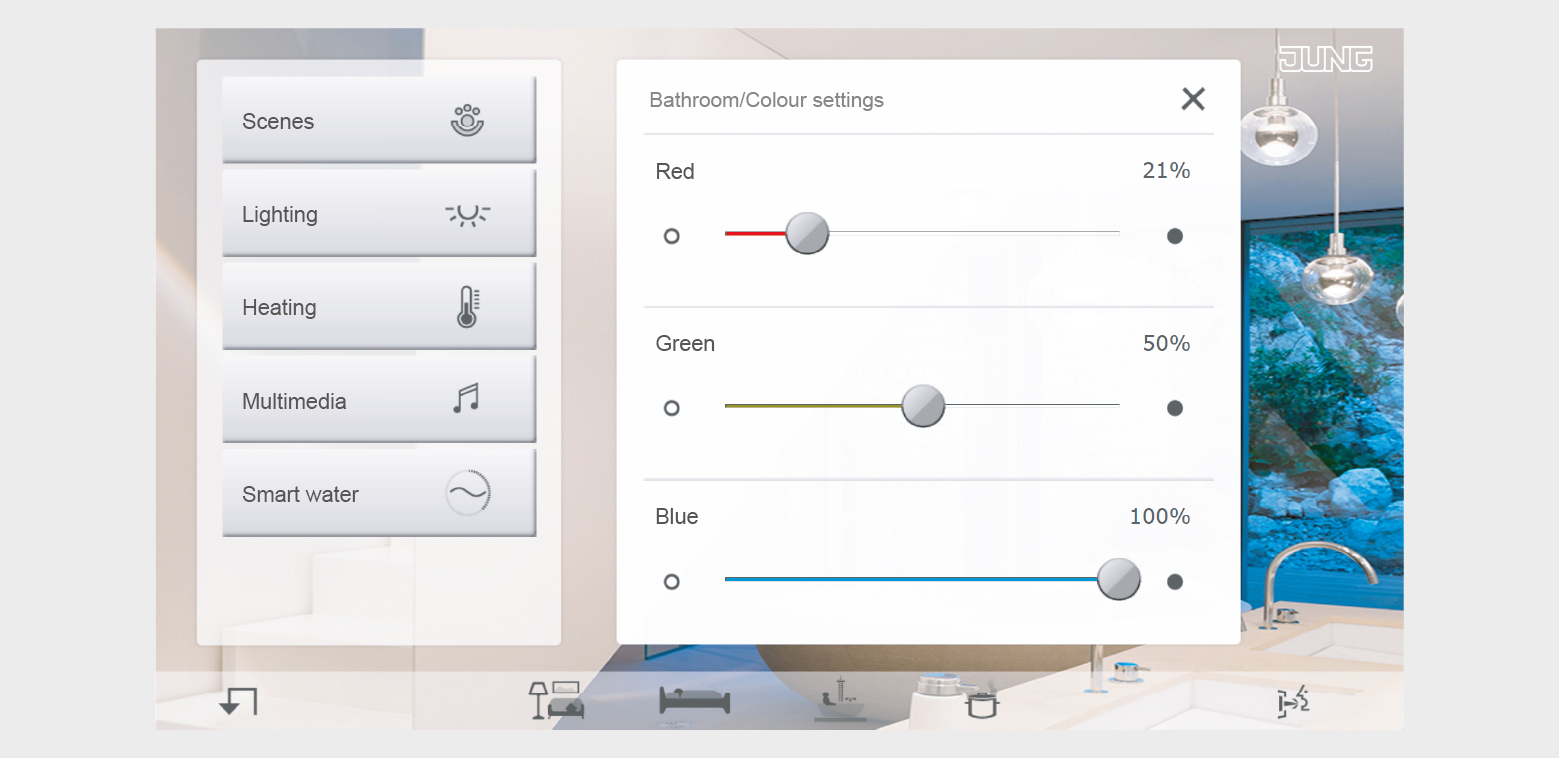
- Control and adjustment of lighting in the public areas (reception, bar, corridors.); the layout of the visualisation is based on the floor plan.
- Administration pages for settings are password-protected.
- The lighting is controlled using the scenes (breakfast, daytime, evening). These are called using a timer switch or a twilight switch.
- Fault alerts are displayed centrally in reception. When a fault occurs, the fault page is called up.
- Control of the lighting and temperature only of the spa area using a separate PC in the spa area (with its own pages).
- Visualisation of the floor plan of the individual floors with monitoring function of the rooms.
The following points are monitored:
1. Key-card switch
2. Windows via window contacts
3. Current value, setpoint and heating operating mode - Central adjustment of the heating in the rooms using Visu Pro.
Required components | See also |
|---|---|
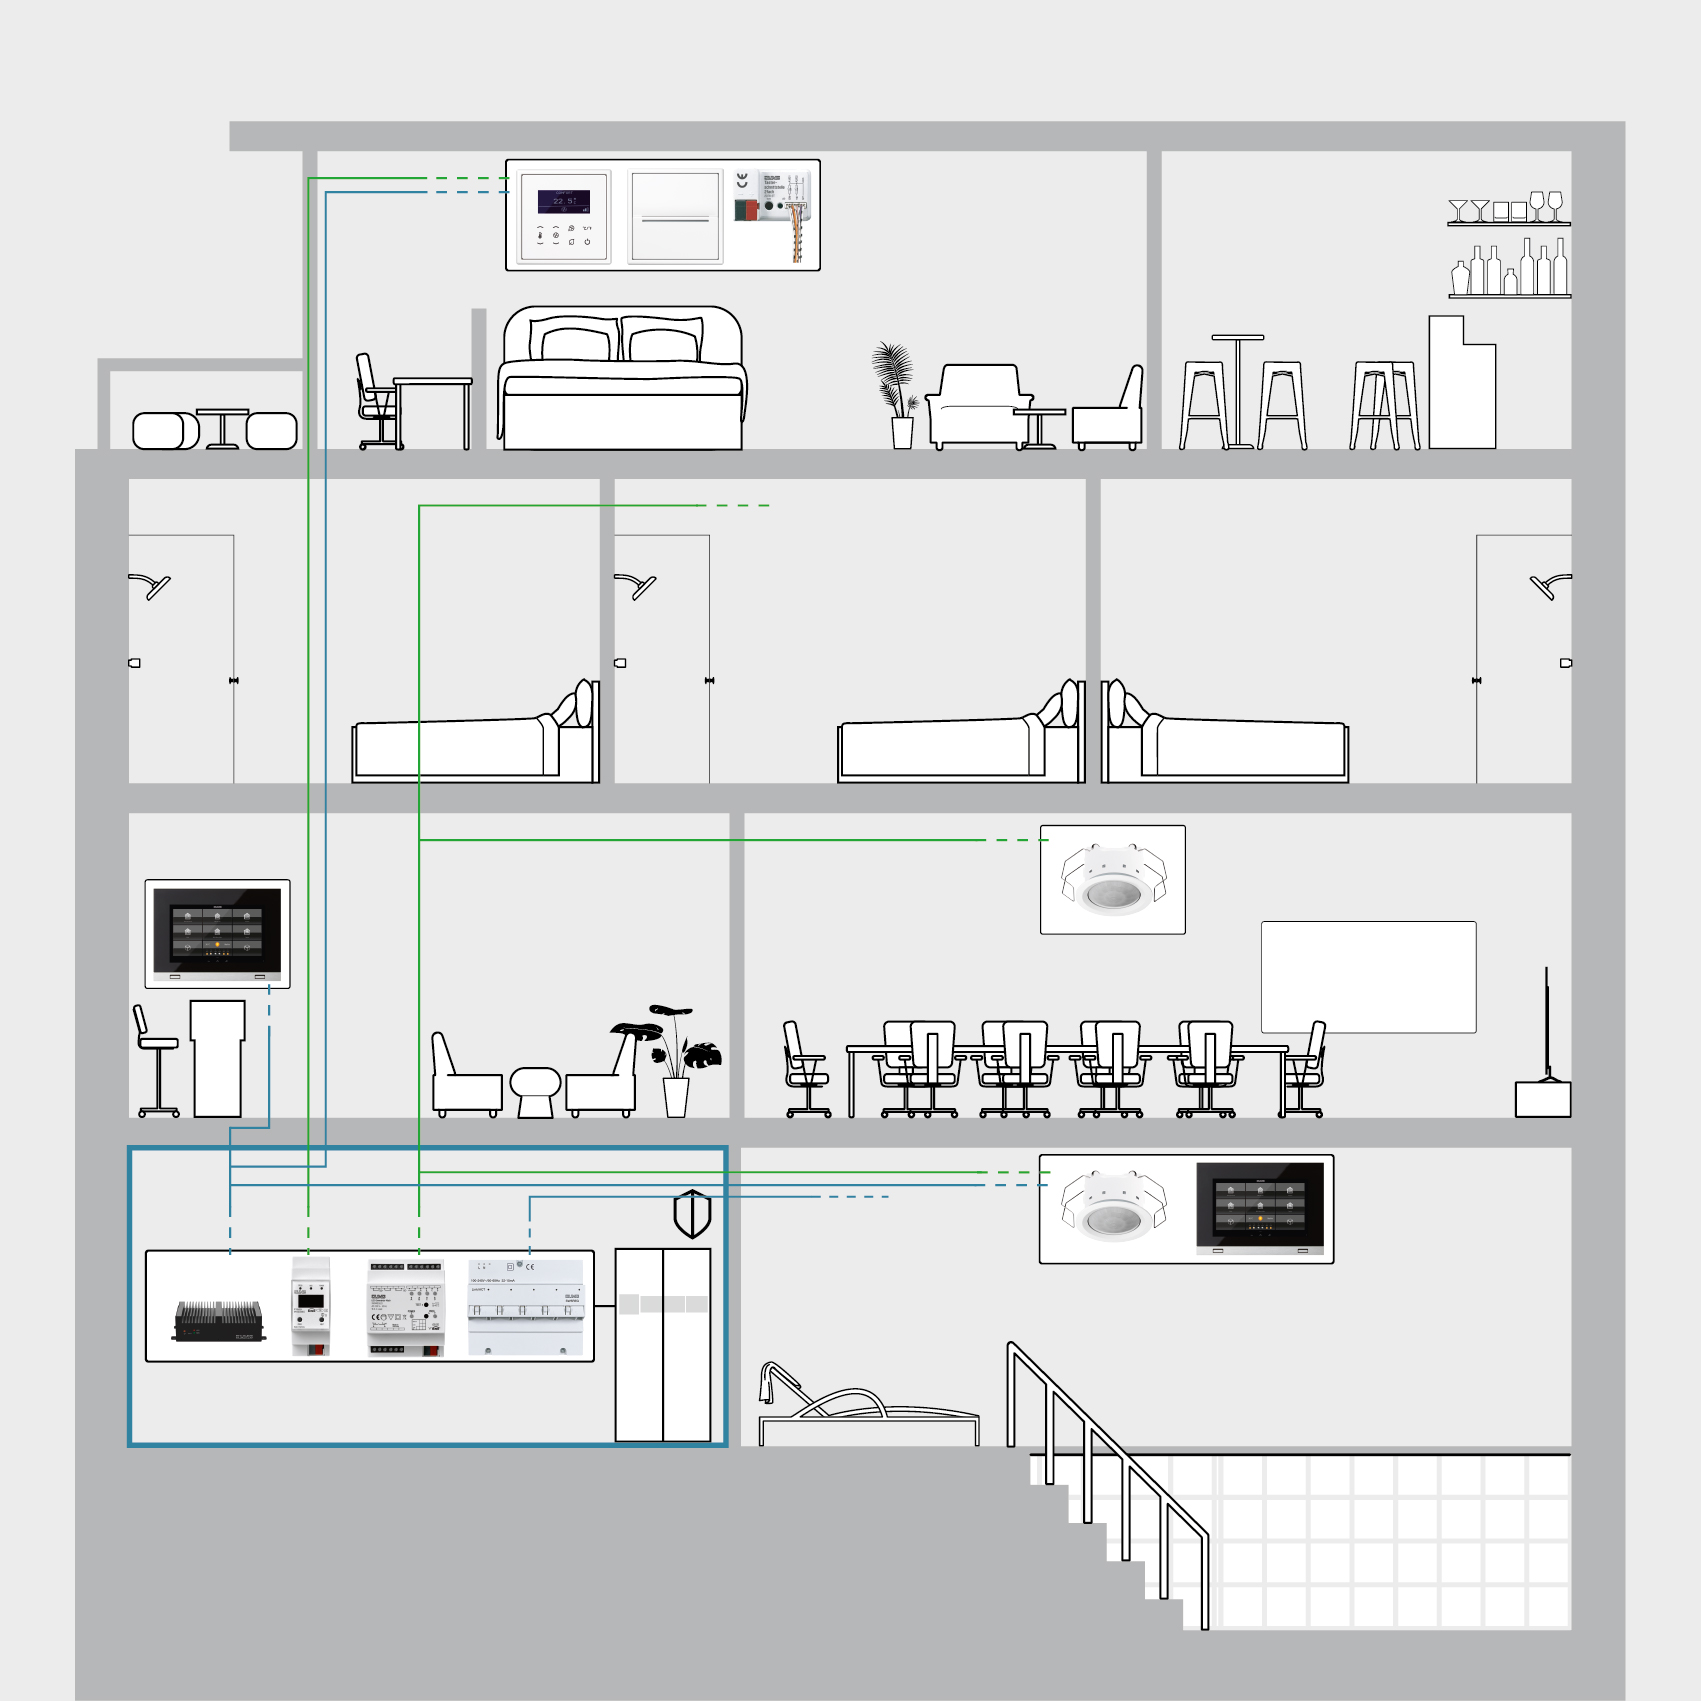
JUNG Visu Pro Server H3 | |
KNX IP router | |
KNX LED dimming actuator, 4-gang | |
KNX presence detector mini | |
Smart Control 8 | |
Network switch | Third party suppliers |
Room thermostat | |
RFID key card holder + energy saving unit | |
Push-button interface (for window contacts) |
Steps in JUNG Visu Pro
- Install the KNX system according to manufacturer’s instructions.
- Export the KNX project.
- Start JUNG Visu Pro and import the project into KNX Editor 2.
Establish the connection to the KNX data interface (IPR 300 S REG). - Create timer switches in the process module and add the desired functions for the devices.
- Start VisEditor and set up optimum resolution pages for the clients.
Use a template or create an individual page.
Protect admin pages with a password. - Start VisServer and select a project.
Allocate a home to every control unit (SC8) and configure the timer switch.
Additional note
The communication can also be set up with KNX IP Secure. This creates additional security in the network. To do so, you have to activate the security properties of the IP router and create the encrypted connection to JUNG Visu Pro.