Connection
For mounting onto the power supply, the frame reference number LS 981 .. (1- to 5-gang) or AL/ES/GCR 2981 (1- to 5-gang) is always required.

- Decide in which direction the information sign is to face.

- Release the centre plate of the cover by levering it off with a flat-bladed screwdriver in the small opening.
- Push the plastic threaded sleeve into the holes provided in the flush-mounted insert.
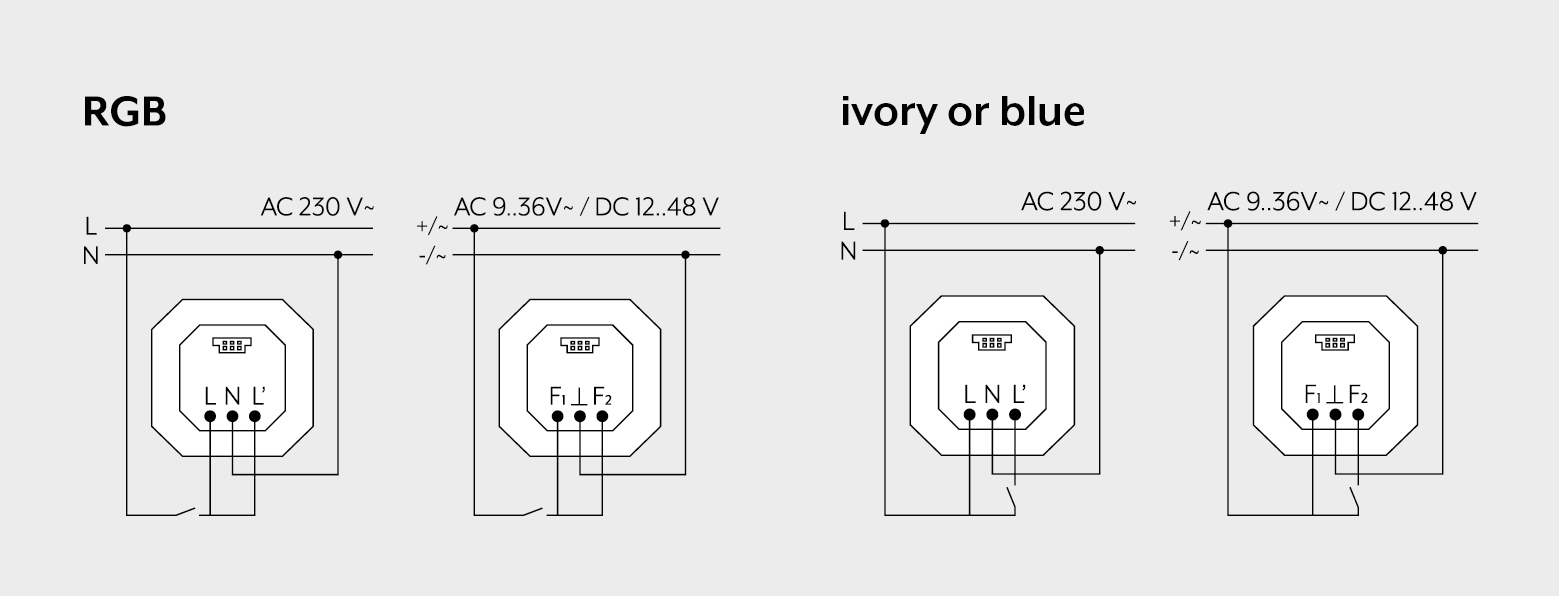
- Attach the flush-mounted insert power supply in accordance with the desired use of the cover.
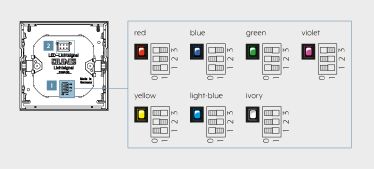
- With LED pilot light with RGB colours: set the colours on the reverse of the 3-pole DIP switch (1).
- Mount the flush-mounted insert power supply in accordance with the required position for the alignment of the information sign in the wall box.
- Mount the frame onto the insert.
- Insert the labelled information sign at the required position.
- Connect the electrical connection of the cover to the plug (2).
- Fasten the cover with the screws in two opposite corners.
- Fit the centre plate onto the cover.