Installation and settings
Installation as a wall-mounted device
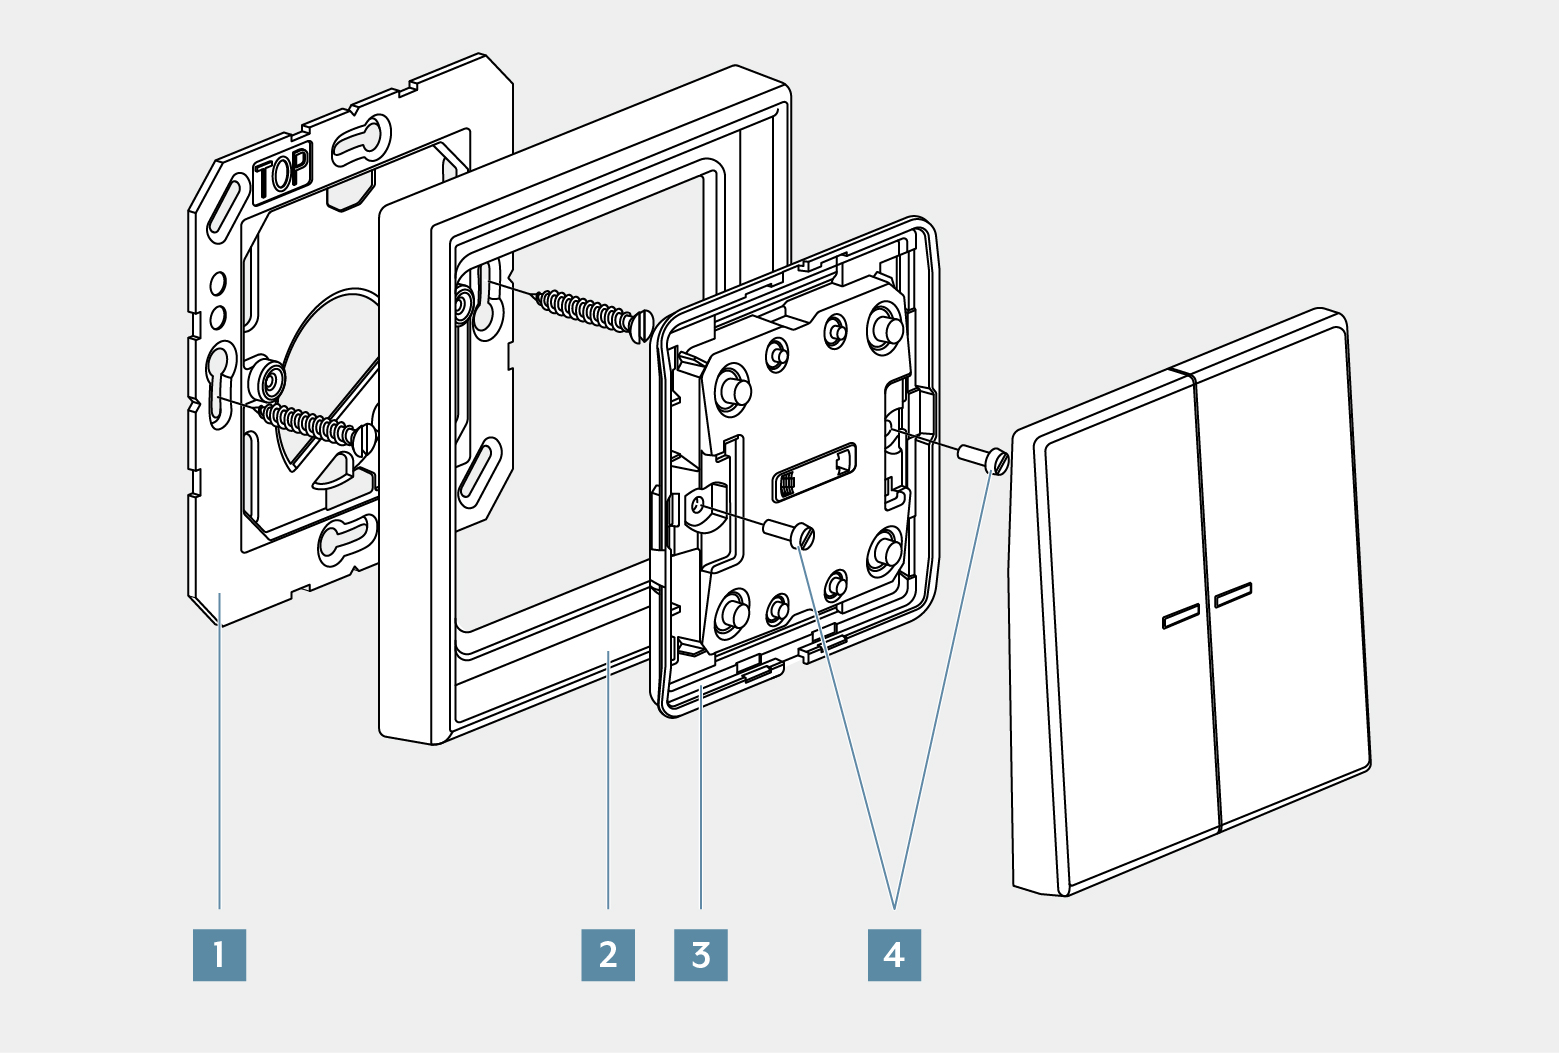
Proceed as follows for mounting:
- Insert the batteries.
- Screw or glue the base plate (1) on an even surface. The label TOP/OBEN must be at the top.
- Position the design frame (2) on the base plate.
- Fasten the push-button module (3) onto the base plate with the screws supplied (4). Tightening the screws too securely can lead to the push-button being damaged.
- Snap the rocker onto the push-button module.
Adhesive fixing
Note the following for the installation:
- The base must be level, dust-free and free of grease.
- For multiple combinations, the adjoining sides of the adhesive pad must be cut along the outer punching using a ruler and cutting knife.
- Likewise, after installing the push-button in the CD range, the protruding adhesive foil on the corners is carefully removed.
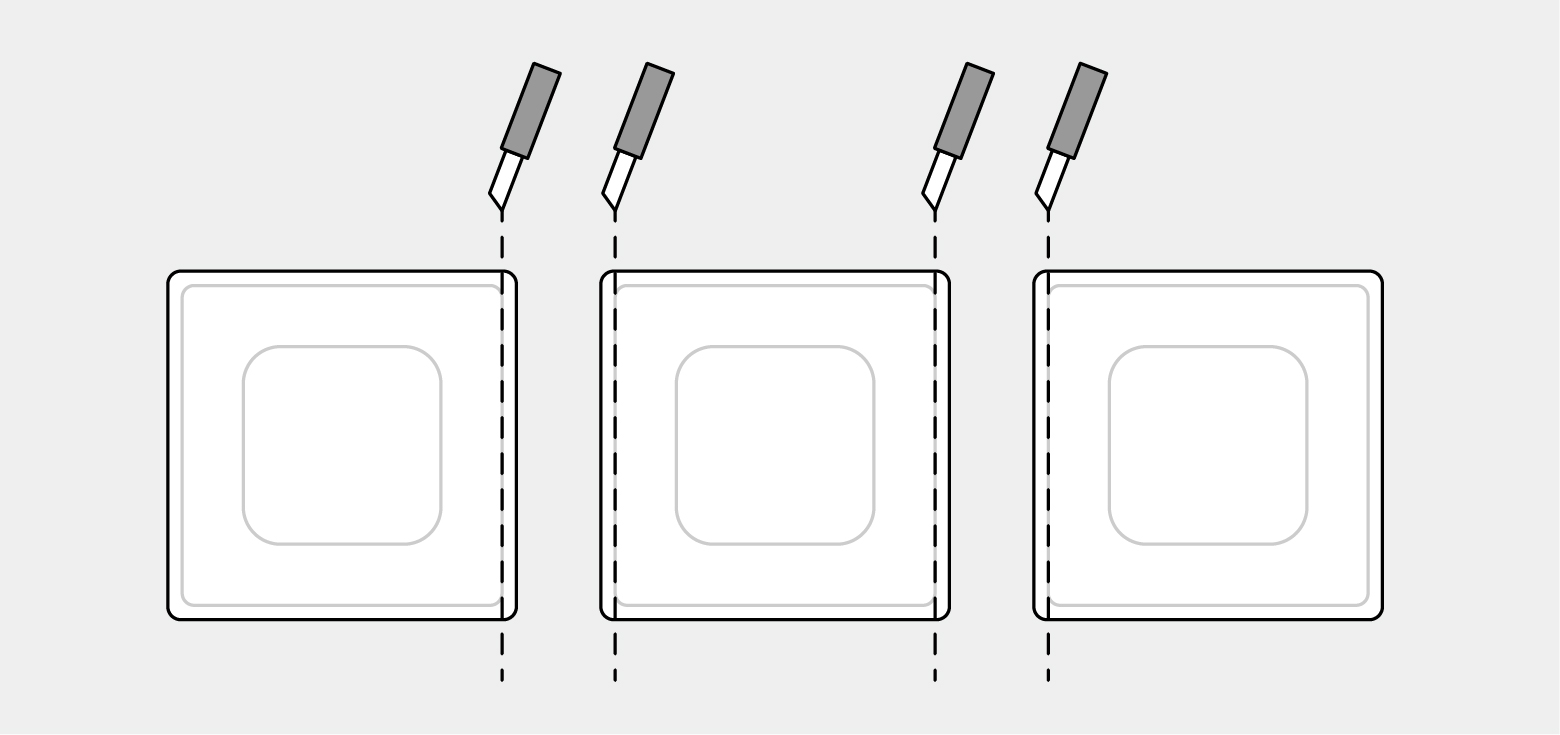
Proceed as follows for the installation:
- Remove the rear, unpunched film of the adhesive pad supplied.
- Stick the adhesive pad onto the surface and spread it out. Remove any air bubbles.
- Remove the two inner segments of the front film.
- Align the base plate on the outer punching and stick on the base plate.
Commissioning
For how to commission the JUNG HOME push-button battery-powered via the JUNG HOME app, see the chapters "Pairing the device“ and "Configuring JUNG HOME push-buttons“.