Installation and settings
Connecting and fitting the system insert
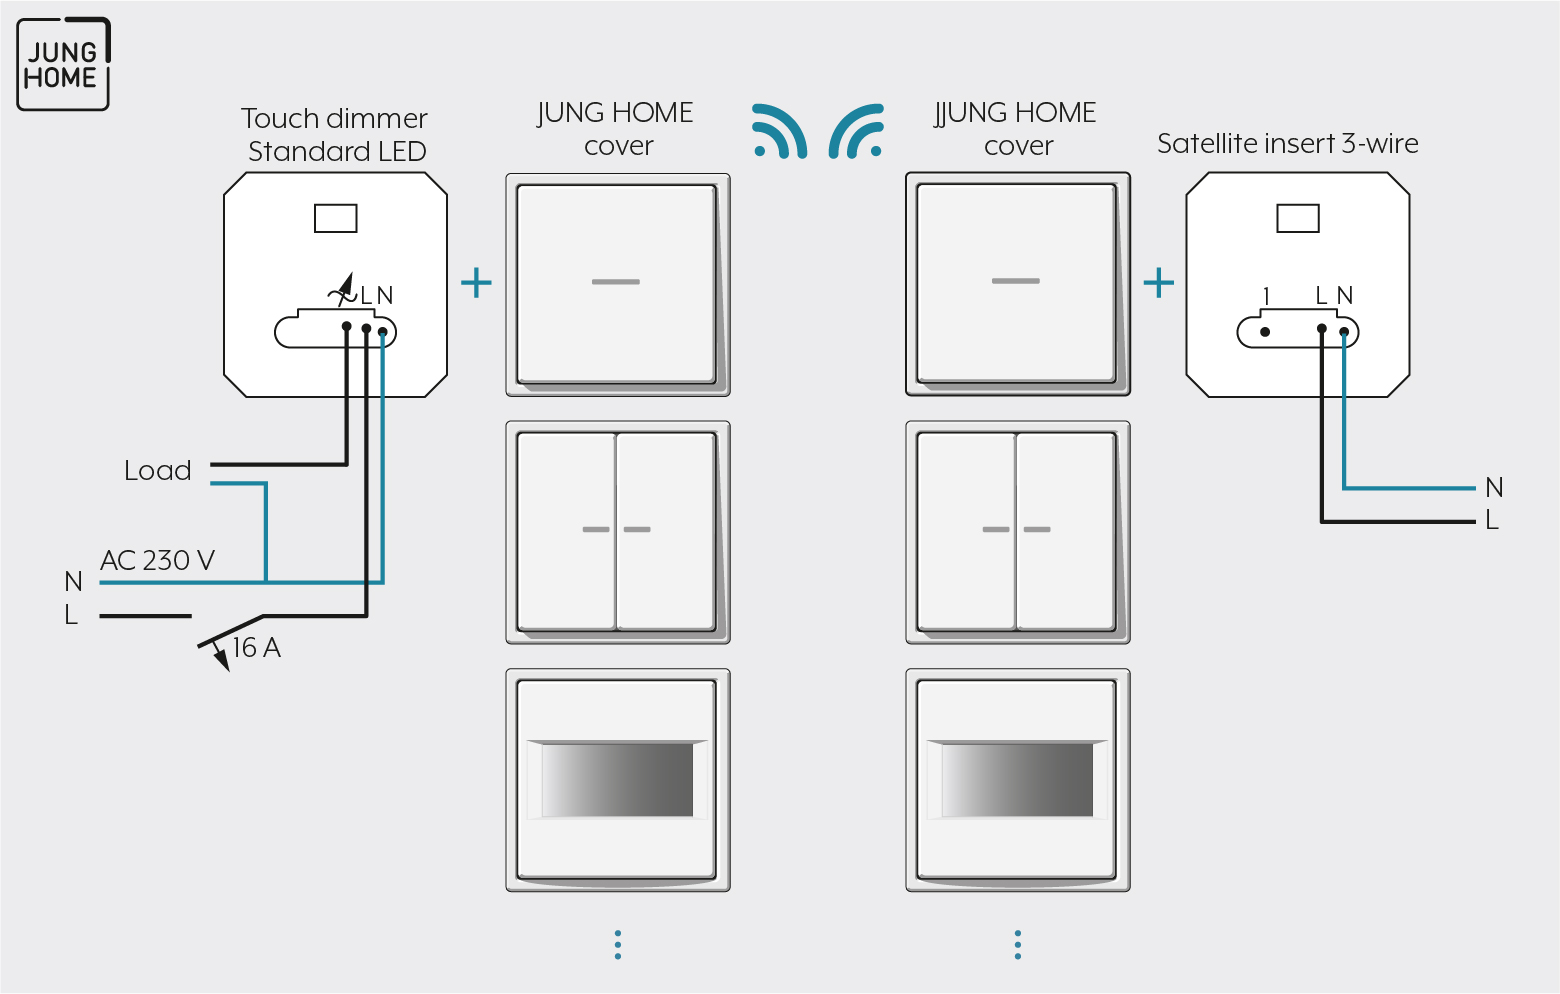
Note the following for the installation:
- For the operation of multiple dimmers or amplifier in one sub-distribution, maintain a clearance of 1 rail unit (approx. 18 millimetres) between the inserts to prevent any overheating.
- Connect maximum 600 W LED or compact fluorescent lamps per 16 A circuit breaker.
- Take note of the instructions of the transformer manufacturer when connecting transformers.
- Only connect illuminated push-buttons if these have a separate terminal for N conductor.
Clampable conductor cross-sections | |
|---|---|
| 1 x 0.5 ... 4 mm² 2 x 0.5 ... 2.5 mm² |
| 1 x 0.5 ... 4 mm² 2 x 0.5 ... 2.5 mm² |
| 1 x 0.5 ... 4 mm² 2 x 0.5 ... 1.5 mm² |


Configure the operating mode
The operating mode must be appropriate for the load. Configuration of the operating mode normally occurs automatically.
It can be necessary, however, to manually set the operating mode.
Universal, R, L, C, LED
- Factory defaults
- Automatic calibration to the load, trailing edge phase control, leading edge phase control
- Type of load:
- Incandescent lamps
- HV halogen lamps
- dimmable HV LED or compact fluorescent lamps
- dimmable electronic or inductive transformers for halogen or LED lamps
LED trailing edge phase control
- Connection of inductive transformers is not permitted
- Type of load:
- Incandescent lamps
- HV halogen lamps
- trailing edge phase control dimmable HV LED or compact fluorescent lamps
- trailing edge phase control dimmable electronic transformers for halogen or LED lamps
LED leading edge phase control
- Connection of inductive transformers is not permitted
- Type of load:
- Incandescent lamps
- HV halogen lamps
- leading edge phase control dimmable HV LED or compact fluorescent lamps
- leading edge phase control dimmable electronic transformers for halogen or LED lamps
In order to set the operating mode, proceed as follows:
- Ensure that the load is switched off.
- Press and hold both buttons simultaneously for longer than four seconds until the LED indicator lights.
- Press one of the two buttons briefly as often as needed for less than a second until the required operating mode is selected.
LED COLOUR | MODE |
|---|---|
green | R, L, C, LED |
red | LED trailing edge phase control |
Blue | LED leading edge phase control |
The indication LED lights in the colour of the selected operating mode.
- Press and hold both buttons simultaneously for longer than one second.
The LED indicator extinguishes and the light is switched on. The operating mode is saved. If one of the two buttons is not pressed for more than one second within 30 seconds, the operating mode is not saved and the LED goes out.