Installation and settings
Connect and install JUNG HOME Puck binary input 2-gang, 230 V
Below you can see an example for connecting the devices. Further examples for other connection possibilities can be found in the operating instructions for the JUNG HOME Puck binary input 2-gang 230 V.
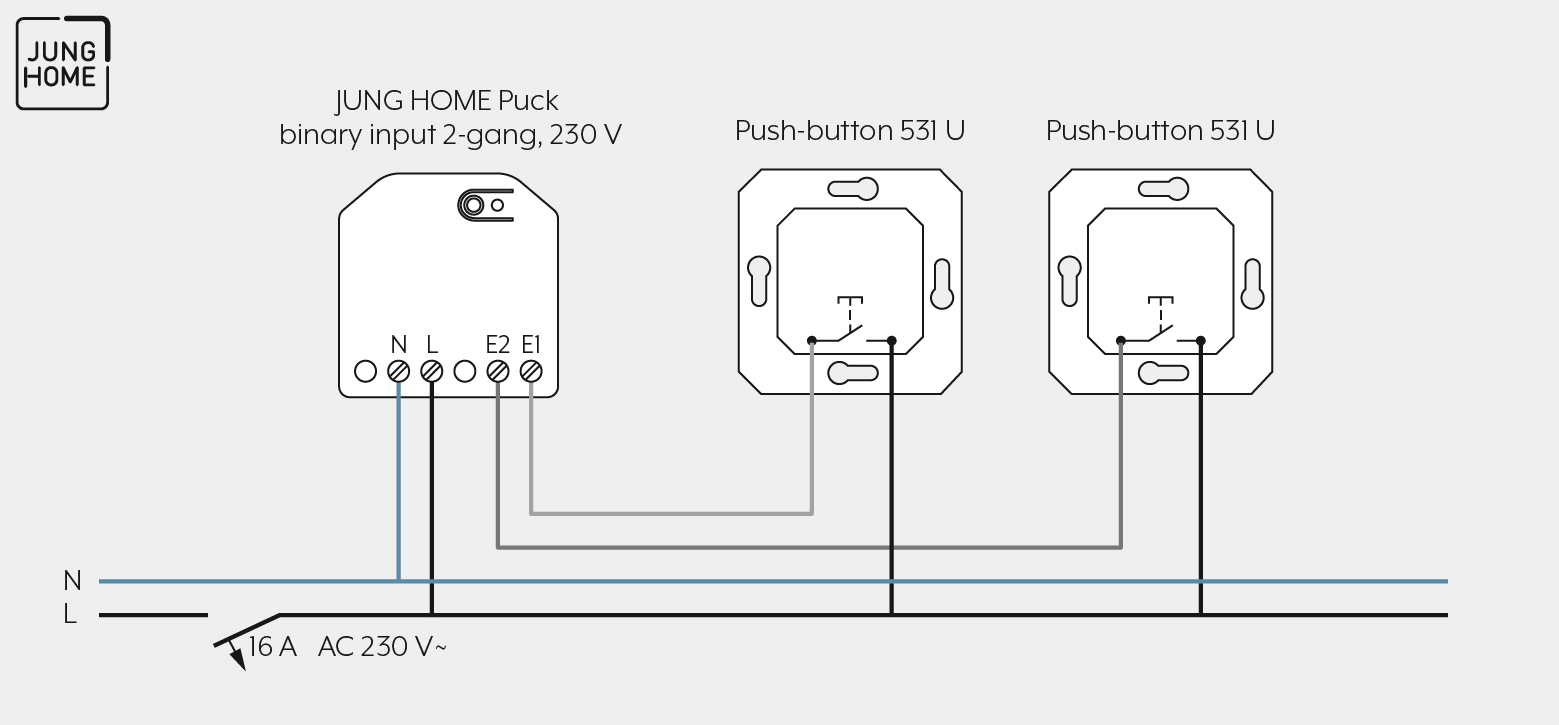
Note the following for the mounting:
Proceed as follows for mounting:
- Connect the binary input according to the connection diagram.
Note the clampable conductor cross sections. - Connect the push-buttons.
If a multi push-button, 2-gang push-button or a wind converter is present, connect these properly to the wind sensor. Further information on connecting these devices to the wind sensor can be found in the operating instructions for the JUNG HOME Puck binary input 2-gang 230 V. - Position the JUNG HOME Puck binary input 2-gang 230 V in the wall box such that the Prog button and the status LED are visible.
- Switch on the mains voltage.
- Mount the appropriate cover.
CLAMPABLE CONDUCTOR CROSS SECTION | |
|---|---|
| 1 x 0.5 … 4 mm² |
| 1 x 0.5 … 4 mm² |
| 1 x 0.5 … 2.5 mm² |


Commissioning
For how to commission the JUNG HOME Puck binary input 2-gang 230 V in the JUNG HOME app, see Chapter "Pair device".